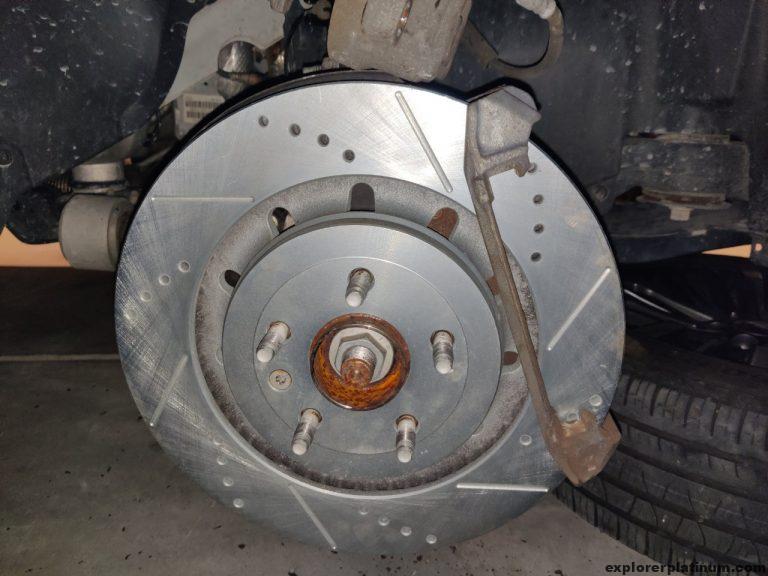
While inspecting my vehicle, I noticed grooves on both my front and rear rotors. Even though my braking system was functioning properly, it was clear that it was time for a revamp. Having had a positive experience with PowerStop on my Xterra, I decided to use them for my Explorer as well.
Note on Rotor Sizes for Ford Explorers:
It’s important to be aware that Ford Explorers can come equipped with one of two different front rotor sizes. You could either have the standard size, which is 325mm, or the larger, heavy-duty size at 352mm. Interestingly, the size of the front rotors on your vehicle will directly influence the type of rotors you need for the rear.
If your Explorer has the standard 325mm front rotors, you’ll pair these with non-vented rear rotors. On the other hand, if your vehicle is fitted with the heavy-duty 352mm front rotors, you’ll need vented rear rotors to match.
In my case, with my 2017 Explorer Platinum, I found that the correct setup was the heavy-duty 352mm front rotors combined with vented rear rotors.
What I used:
- PowerStop K6375-36 Front and Rear Z36 Kit
- 19mm deep socket to remove lug nut
- 18mm socket for caliper bracket
- 17mm socket for caliper guide pin bolt
- Breaker bar to remove stubborn bolts like the caliper bracket bolt
- 4″ C-Clamp to compress caliper pistons
- Wire Brush for cleaning any rust
- Copper Anti-seize applied to rotor mating surface and brake pad tab
- SIL-Glyde Silicone Based Lubricant for guide pins bolt
- Brake cleaner for cleaning off grease from the rotors and helpful to remove any grease
Step 1: Slightly Loosen lug nut from wheel. Note: Loosen, not remove.

Start by slightly loosening the 19mm lug nut from the front tire, making it easier to remove when the wheel is off the ground.
Step 2: Jacking up the car.
If you’re only changing the front brake rotors and pads, jacking up the front should be sufficient.
Step 3: Removing the wheel.

With the wheel off the ground, remove the lug nuts entirely and take off the wheel.
Step 4: Remove the rotor set screw
Utilize the brake pads to remove the rotor screw with a T40 Torx bit. It’s handy to have someone pressing the brakes while you’re doing this.

Step 5: Removing the caliper body and bracket

Use the 18mm socket with a breaker bar to achieve this.

Once removed, place the Caliper body + bracket on top of the suspension knuckle. To ensure it stays put, consider securing it with a zip tie or short bungie cord.
Step 6: Replacing the rotors

Once the rotor is removed, I took the opportunity to clean the mating surface. I cleaned it with a wire brush and applied copper anti-seize on the mating surface after.

Before putting on new rotors I always clean the factory oil off of it by using a brake cleaner. This is to prevent oil from contaminating the brake pads.
Step 7: Reinstall caliper body + bracket
Use the 18mm bolt to install the caliper body + bracket.
Step 8: Installing new clips and brake pads.

Start by removing the caliper body using a 17mm socket to remove the caliper guide pin bolts. Once the bolts are removed, slide the caliper body off. Ensure the caliper is not dangling to avoid stressing the brake line.


Next, remove and replace the brake pads and clips. Cleaning the rust and gunk on the clip seating area with a wire brush will make installing the new clips easier.

Note the picture below, the pads have different anti-rattle springs on them, so pay attention to their orientation during installation.

I noticed the pads have different anti-rattle springs on them. I installed the flat top was on the outside and the pointy top was on the inside.

Brake pads installed.
Step 9:Relubricate the caliper guide pins and reinstall the caliper body

You’ll need to compress the pistons before reinstalling the caliper body. I used a 4″ C-Clamp with the old brake pad to compress the pistons.

Relubricated the guide pin with SIL-Glyde Silicone Based Lubricant. What’s nice about the PowerStop brake kit is that it came with new pin boots, pin bushing so I replaced those. Afterwards, I installed the caliper.
Helpful notes:
- This stage of the process can be slightly challenging, especially since the inside brake pad tends to pop out. To tackle this, I held the pads together while having someone else position the caliper body atop the pads.
- Alternatively, you could consider installing the caliper body first, but only with the top guide pin bolt. This arrangement allows the caliper to swing upwards freely. Once it’s up, you can install both the inside and outside brake pads, then swing the caliper back down.

And there you have it – the front brake pads and rotors have been successfully replaced!