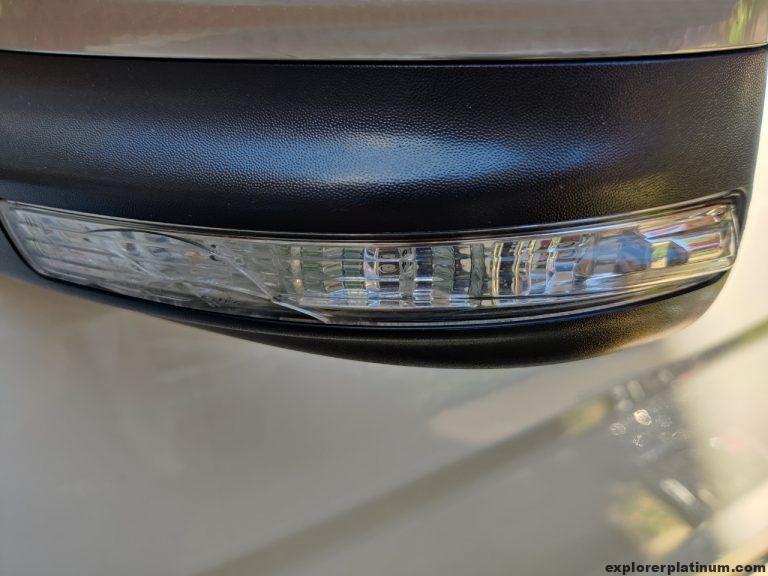
In this blog post, I’ll address the issue of a broken left mirror indicator light on my 2017 Ford Explorer Platinum. Ideally, fixing the indicator light would be a simple three-step process, but unfortunately, it requires disassembling most of the housing. Fortunately for you, dear readers, I have documented the entire process to make it easier for you to tackle this task on your own.
What I’ll be using
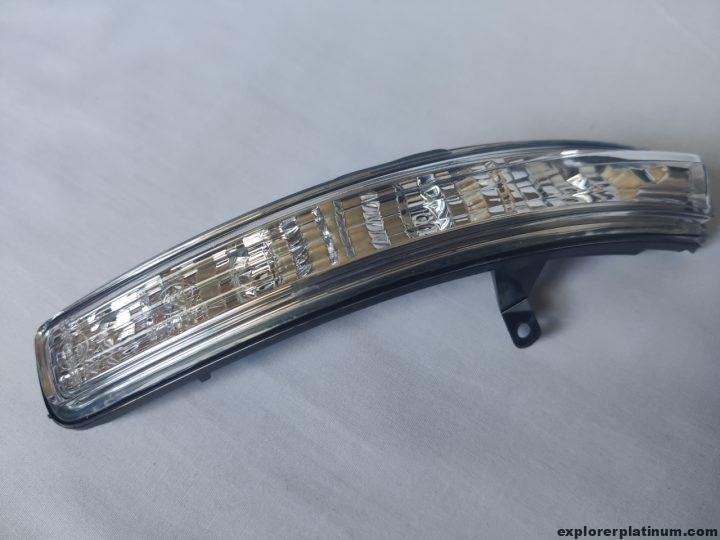
- Ford Explorer Signal Lamp BB5Z13B375A (Left Driver side)
- Ford Explorer Signal Lamp BB5Z13B374A (Right Passenger Side)
- T15 Torx Screwdriver
- Flat head screwdriver
- Extra pair of hands for help
 Ford Explorer Signal Lamp BB5Z13B375A (Left Driver side)
Step One: Detaching the mirror
To make my life easier, I readjusted the mirror so I can access the clips and insert my flat head screwdriver. There are a total of 4 tabs on the mirror that have 2 clips each holding it. I only needed to detach 2 out of 4 tabs to remove the mirror.

I inserted the screw driver in-between the center nub and used my other finger to pull back on the tabs. Even though there’s two tabs for each section, I pulled back on only one and was able to push in the screw driver to detach each section.

These are the tabs that needs to be pulled back.

I detached only two sections indicated above with arrows and was able to nudge the mirror towards the car to pop it off. I was happy that I only had detach only 2/4 sections because I could not find a good position to detach the tabs that was located closer to the car.
Step Two: Detaching the wire harnesses
The flat head screwdriver and an extra set of hands came in handy for this step.

The circled areas are all the harness I detached. For the plastic harness, I used a flat head screwdriver to unlock them and then I pulled on the harness to detach it.

To remove the quick disconnects I inserted my flat head in-between each and slowly wiggled it off.

Do the same for the blinker light harness. I inserted a flat head and wiggled off the harness.
Step Three: Removing the plastic shroud
 To remove these screws, I used a T-15 Torx screwdriver.

After the torx screws were removed I was able to insert a flat head screwdriver into this slot to release the tab holding the plastic shroud in place. This plastic shroud actually has two tabs to holding it, one on each end. Releasing one of them was enough for me to detach the shroud.

After the tab was released I was able to pull out the plastic shroud.
Step Four: Remove the top mirror cap cover.
For this step, I removed the top mirror cap cover. On my Explorer the cap was chrome color. I was able to just pop it off.
Step Five: Remove the rest of the housing
This step is a little tricky. There’s some clips I had to move upwards and another that I had to slide out to disengage the housing.

The bottom clip I had to move upwards. After, I slid the top clip to the side.

After those two clips were no longer in the way, I was able to detach the rest of the housing.
Step Six: Install the blinker light
Finally! I’m almost there.

There’s two tabs that keep the blinker light in place. It was actually difficult for me to remove the blinker light by hand so I had to use a flat head screwdriver to pry it out.
Step Seven: Do the reverse and put everything back.
I actually struggled on this step for a good hour. Nothing was aligning. Then I realized there’s two clips from step five I had to maneuver it back to its original position. Once those two clips were put back, everything was able to fit together with ease.

All fixed!