Recently, I replaced the brake pads and rotors on my 2017 Ford Explorer Platinum, and the final step was to bleed the brakes. I recalled that when I first bled the brakes on my 2008 Xterra at 80,000 miles, the initial brake fluid was a rusty brown color. I was curious to see if my Explorer would have a similar issue at 55,000 miles.
What I used:
- Brake bleeding bottle I created. Cost only a few dollars to make.
- Zip tie to keep the hose secure on front brake bleeder screw
- 10mm combination wrench for the front brake bleeder screw
- 11mm combination wrench for the rear brake bleeder screw
- DOT 4 brake fluid
Bleeding sequence:
The bleeding sequence for the Ford Explorer is straightforward. Start with the brake furthest away from the master cylinder and work your way closer.
- 1st Rear Passenger
- 2nd Rear Driver
- 3rd Front Passenger
- 4th Front Driver
Bleeding Rear
Step 1: Locate the brake bleeder screw

Step 2: Use an 11mm wrench to loosen the screw and insert the 1/4″ hose.

Step 3: Bleed the brakes and monitor the brake fluid reservoir.

In my case, the fluid in the rear brakes appeared clean, so I only performed 5 pumps on the brakes. Contaminated brake fluid is typically brown, rusty, and murky, but as seen in the picture, mine was clear. Remember to monitor and refill the brake fluid reservoir with DOT 4 brake fluid.
Bleeding Front:
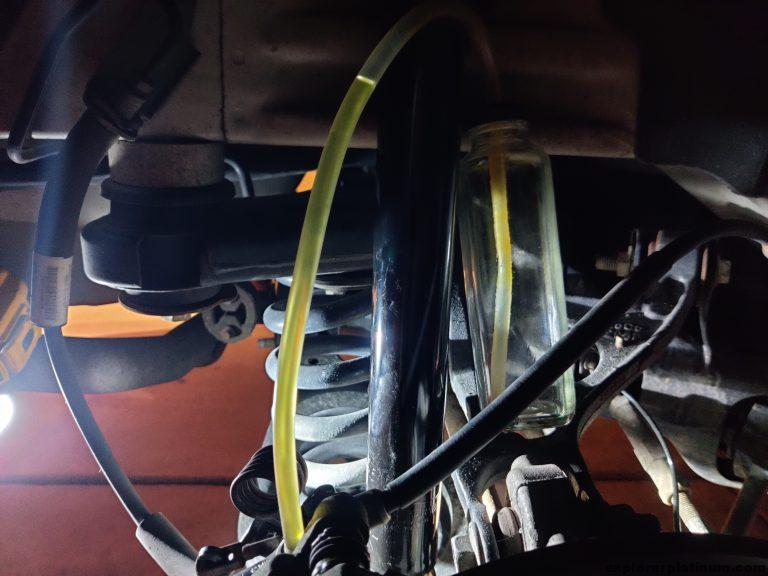
Step 1: Locate brake bleeder screw.

Step 2: Use a 10mm wrench to loosen the screw and insert the 1/4″ hose.

I prefer to use the box end of the wrench, as it can be left on the bleeder screw and turned as needed. Since the front bleeder screw is 1mm smaller than the rear, you might need a mini zip tie to keep the hose secure.
Step 3: Bleed the brakes and monitor the brake fluid reservoir.
The brake fluid from my Explorer’s front brakes also looked clean, so I only performed 5 pumps on the brakes. Be sure to monitor and refill the brake fluid reservoir with DOT 4 brake fluid.
Bleeding the brake fluid on a 2017 Ford Explorer Platinum proved to be a simple task. I was pleased to find that the fluid from all the brake calipers was clean and not contaminated.