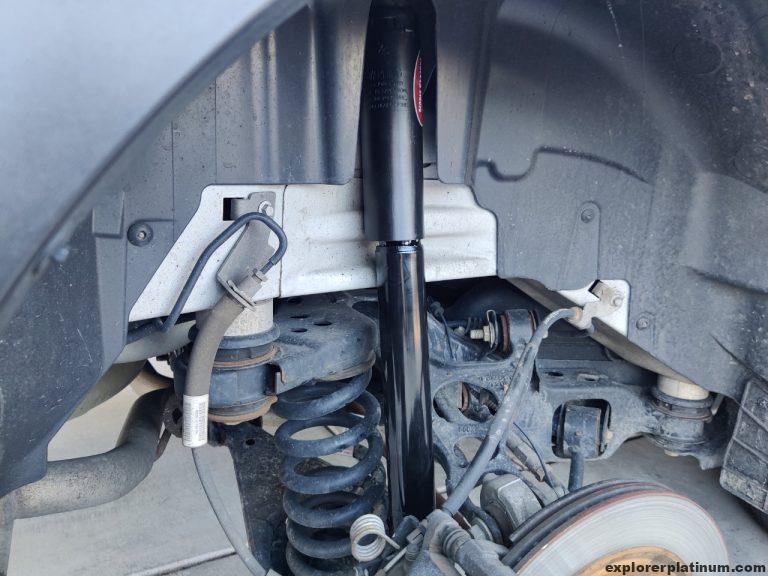
Since I was changing out the front strut of my 2017 Ford Explorer I decided to also change the rear shocks. I decided to change my shocks to Monroe but ultimately changed it back to OEM. You can read more about my experienced with Monroe by clicking here. Here’s how I changed my rear shocks:
What I used:
- 15mm socket for rear stabilizer bar link
- 17mm open wrench for rear stabilizer bar link
- 18mm deep socket for rear shock lower bolt and upper shock nut
- Impact gun to remove upper shock nut
- Jack to support the lower arm
Step 1: Slightly Loosen lug nut from wheel while the car is on the ground. Note: Loosen, not remove.
 Breaking loose the lug nuts while the car is on the ground makes it a lot easier to remove once the car is jacked up.
Step 2: Jack up the car
Jacking up the rear should be good enough if you are only changing the rear shocks.
Step 3: Take off the lugs nuts and remove the wheel.
Now that the wheel is off the ground, you should be able to take the lug nuts off entirely and remove the wheel.
Step 4: Put some support under the lower arm.
 Putting some support on the lower arm makes it easier to remove the rear stabilizer bar link.
Step 5: Remove rear stabilizer bar link upper nut
 You’ll need to free the top stabilizer to access the shock’s lower bolt because the “nut” side is welded on.
 I used a 17mm wrench to keep the rod still and a 15mm socket to loosen.
 Once the nut is removed, disconnect the stabilizer bar link by pushing it out. Mine was stuck so I used a hammer to push it out.
Step 6: Remove the rear shock lower bolt.
 I used a breaker bar, extension (probably didn’t need this) and then a 18mm deep socket.
Step 7: Remove shock upper nut and insulator

 To access the upper nut, you’ll need to go inside the rear trunk, look for the cup holders and then locate these plastic tray covers in the pics above. I was able to pry the covers up by inserting a flat screw driver, tilting it slightly to create a wedge, and then lifting it. Inserting a thin flat screw driver in one of the holes and I was able to lightly pry the cover up and then off.
 Lift the cover you should notice a 18mm nut. I noticed there’s an inner tie rod, and usually that will spin if there’s nothing holding it. I didn’t want to waste any time so I decided it will be easier to use an 18mm deep socket paired with an impact gun to loosen the nut.
 Once fully loose, I was able pull off the top nut and insulator.
Step 8: Remove the shock.
 In order to remove the shock I had to compress it upwards to move it away from the lower control arm and then give it a tug to release the hold from the top.
Step 9: Install the new shock.
I was able to do the reverse and reinstall the new shocks.
Monroe shocks had a small difference in their design compared to Ford. Here were the changes:
 Monroe shocks comes with a different insulator setup compared to Ford’s. Above picture is for reference on how I installed it.. The shocks come with a metal sleeve (looks like a small metal pipe) that I inserted into the bottom insulator.
 Another minor difference, the nut is not welded onto the shock, instead, Monroe provides a 21mm nut. I used a socket to hold the 21mm nut while I tightened the 18mm bolt.
 Tada, rear shocks all installed.
Perfect instructions. Thanks!
Thank you! Glad you found them helpful.