Ford recommends that the cabin air filter in my 2017 Explorer Platinum be replaced every 20,000 miles. Typically the cabin air filter is overlooked and forgotten. I am the second owner of this vehicle, let’s check it out.
What I used:
Step 1: Go to your glove box

Step 2: Open the glove box

Step 3: Remove 2 plastic white pins under the glove box
 There’s two plastic white pins under the glove box that needs to be removed. To remove them, they need to be pulled out. I circled the location of the pins and the arrows are the directions to where I pulled them out.
 Here’s what they look like when they come out.
Step 4: Detaching the glove box
 There’s two tabs on top of the glove box, these will need to be pressed on and pushed upwards.
 Once detached from the top two tabs, I let the left of the glove box rest on the floor. I’ll admit, I was being lazy and didn’t want to detach the string.
Step 5: Accessing the air filter
 With the glove box out the way, the cabin air filter is within reach. There’s a plastic cover that needs to be removed. It’s held together with two tabs that I circled above. These tabs can be flipped outwards (towards you) and the cover should pop off. I suggest flipping the right tab first.
Step 6: Remove old air filter and install new filter

The cabin air filter can be pulled out. Remember when installing the new cabin air filter you have to mindful of the air flow direction. The air flows downwards.
 Here is the old filter.
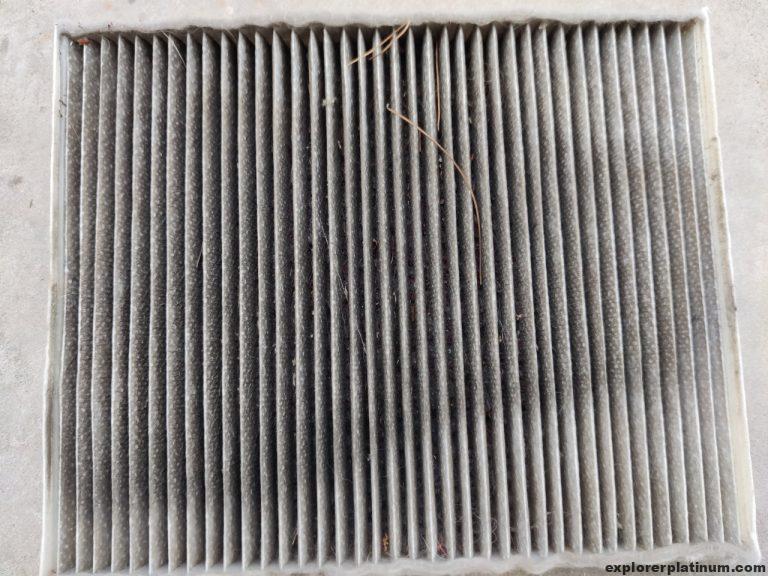
 A close up shows how nasty it really is. Glad I changed it though!
How is it that the air flow of this cabin filter indicates up flow towards the windshield, but the air is actually flowing down towards the floorboard? Which is correct?
Hey Carlos, I researched more into this and you are correct. I must have had it mixed up. I’ll correct the post. Thanks for the heads up.